the net bars and flotation buoys for the nets sat for a few days, left alone for them to thoroughly dry. while this was going on, I was scratching my head, pondering over an idea that was hampered by the fact that I had already cemented some of the deck props in place. "boy, I wish I hadn't done that", I thought to myself as I was looking it over....like a pool player checking out the next shot. "well, I guess I'll just have to work around them", was the only thing I could come to realize. I started by re-doing the back stay / shroud line seizings and stowing away some of the ropes that were dangling along side the ship with clothes pins. I was down to the port boom aft stay {I think that's what it's called}, when I decided to commit to my idea. this left it as "the last clothes pin hanging" {besides the net bar hoist lines}.


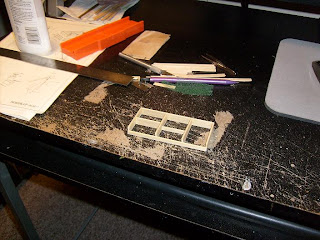
This last picture shows where the last of the buoys that I had made went. all twelve are now on the ship, in various places. the idea that I had in mind was a fish box......that open area on the starboard side of the deck was just begging to be filled. the deck was a bit barren.......it made me think of what I could do to busy the deck up a bit more. I go to another website where these ship are quite prominent....extra netting and fish boxes {bins} seem to be the highlight in most builds of this type. I had enough strip stock to do it....and so I began to construct one. the nice thing about them is that they do not conform to any set rule of thumb. they don't really need to be square.....however, I did try to make mine as "nice" as possible. I also allowed for an adequate "walkway" around it......it had to be functional. I remembered that I had something on "how to make one".......this led me to the Nordkap instructions. there, it shows a diagram of a six - compartmented bin. I started by making the box itself.


I wasn't going to divide the last compartment, but in the end, I did. it just looked silly to have a big compartment and four smaller ones.
Once it was sanded and the mahogany bracketing was leveled off, it was ready for staining and clear lacquer. I used a light stain, so the glue marks wouldn't show. the stain made the mahogany stand out and gave the box a honey pine color.
when the stain had set enough......and after two applications, it was time to wipe down and apply the clear lacquer.
When the fish box was dry, after getting two coats of lacquer as well, it was time for a dry fit. after I had snapped a couple of pictures, I got the itch to see it with a net bar on it. I installed the port side net bar, and was amazed at what a change it made in the looks of the Cux!
As I snapped the last picture, I looked at the clock........it was late. I had another idea running through my mind......but I guess it will have to wait till tomorrow. what I had in mind was a bit more "filling".......a few more obstacles that I would have to work around. I will sleep on it and come up with something to accomplish what I wanted to do. AHOY!


